How to Prepare a Mole Photo for Online Analysis: Step-by-Step Guide
Guide to prepare mole photos for online analysis.
Introduction
Accurate mole photography is essential in the realm of dermatology, especially when utilizing online analysis tools. Properly capturing your moles can aid in early detection of potential skin issues, providing vital information that can be used by healthcare professionals. Online analysis serves as a preliminary step in identifying changes in moles, which can be important for early intervention and management.
The role of online analysis in early detection cannot be overstated. While it is never a replacement for professional medical diagnosis, it can provide valuable insights and prompt timely medical consultation when necessary. This guide will walk you through the steps to ensure your mole photos are ready for online analysis.
Understanding the Basics of Mole Photography
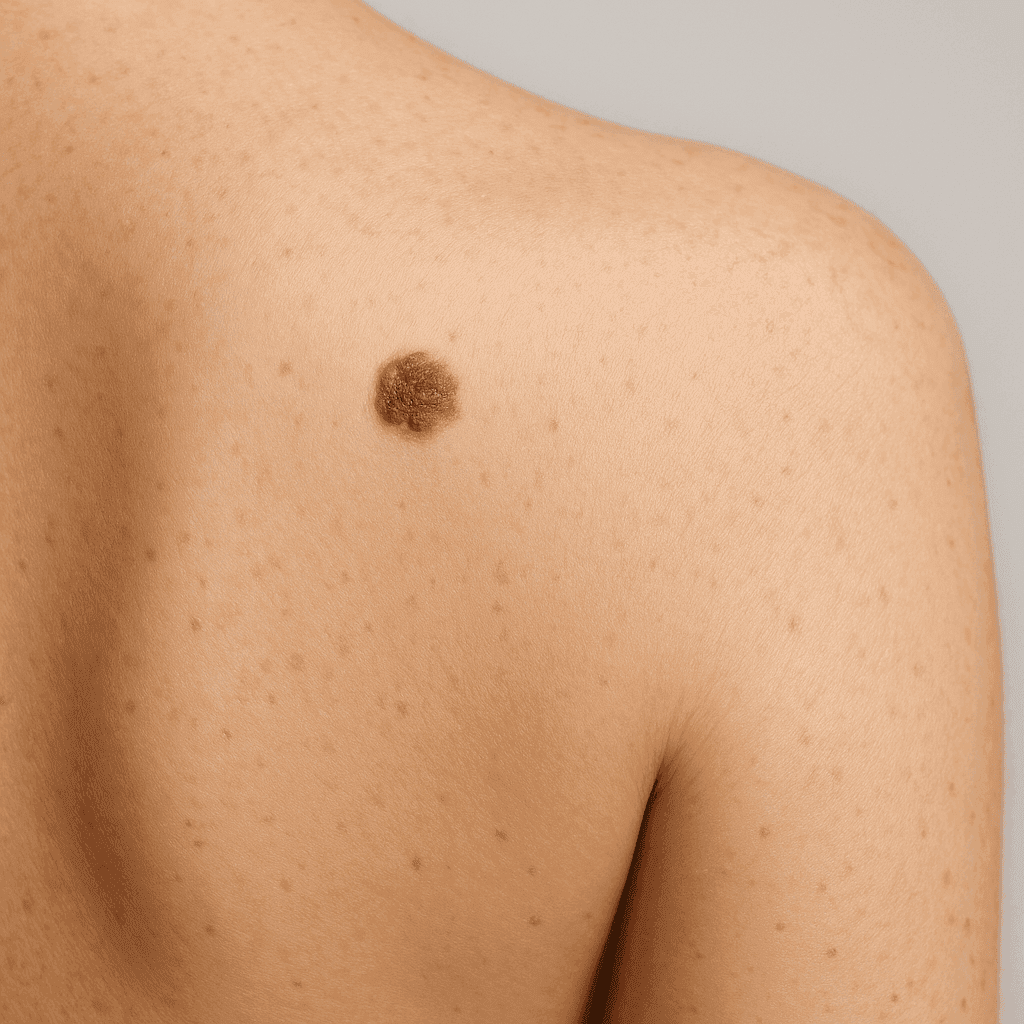
Mole photography involves capturing clear, detailed images of skin moles to aid in their assessment. Quality images are crucial for online analysis as they allow dermatological platforms to accurately assess risks and changes in moles. The importance of these images lies in their ability to provide detailed views, helping in identifying any asymmetry or irregularities.
Why Quality Images Matter for Online Analysis
High-quality images ensure that all necessary details are captured clearly. This includes the color, border, and size of the mole, which are critical factors in risk assessment. Online platforms rely on these details to provide accurate analysis, which can then be reviewed by dermatologists if needed.
Step-by-Step Guide to Preparing a Mole Photo
Choosing the Right Equipment
Selecting the appropriate equipment is the first step in capturing a clear image of your mole. Both cameras and smartphones can be used effectively, but each has its pros and cons. Cameras typically offer higher resolution images, while smartphones provide convenience and ease of use.
Recommended Tools for Better Image Quality
For optimal results, consider using a tripod to stabilize your camera or smartphone. This helps in avoiding blurry images caused by hand movements. Additionally, using a macro lens can enhance the details captured, especially for smaller moles.
Setting Up the Environment
Good lighting is essential for capturing clear images. Natural light is preferable as it reduces shadows and glare. Position yourself near a window or use soft, diffused artificial lighting to illuminate the area.
Choosing the Right Background
A plain background provides contrast, making the mole more visible. Avoid busy patterns that may distract from the mole itself. A white or neutral colored surface usually works best.
Capturing the Image
Position your camera or smartphone directly above the mole, ensuring the lens is parallel to the skin to avoid distortion. Frame the mole in the center of the image, leaving some space around it for context. This allows for a complete view of the mole and its immediate surroundings.
Ensure the image is sharp and in focus. Use your device's focus lock feature if available, and take multiple shots to choose the best one later. Check the clarity by zooming in on the image to ensure details are visible.
Editing and Enhancing the Photo
Basic edits can enhance image clarity. Adjust the brightness and contrast to better highlight the mole, but avoid over-editing, which can alter the mole's appearance. Authenticity is crucial as over-edited images may misrepresent the actual condition of the mole.
Submitting Your Mole Photo for Online Analysis
Once your photo is ready, upload it to a reputable dermatology platform. Ensure that the platform prioritizes privacy and data security, protecting your personal information. Many platforms provide guidelines on image size and format, so be sure to comply with these requirements for a smooth submission process.
Common Mistakes to Avoid
Avoid common pitfalls to ensure your mole photos are suitable for analysis. Blurry images are often the result of camera shake or poor focus. Use a tripod or stabilize your device to prevent this. Poor lighting conditions can obscure important details, so ensure adequate lighting when taking your photos.
Misleading angles can distort the size and shape of the mole. Position your camera directly above the mole to capture an accurate representation. Review your images to ensure they meet these standards before submission.
Conclusion
Capturing high-quality images of your moles is a crucial step in utilizing online dermatology services effectively. By following best practices, you can ensure your images are clear and informative, facilitating better initial assessments through online platforms. Regular monitoring of your skin and moles is encouraged, as it plays a vital role in early detection and management of potential skin issues.
FAQ
What is the best way to photograph a mole for online analysis?
Ensure good lighting and use a stable surface like a tripod. Position the camera directly above the mole to avoid distortion.
How can I ensure my mole photo is clear and focused?
Use the focus lock feature on your device and check the clarity by zooming in on the image.
Are there any specific apps recommended for mole analysis?
While specific app recommendations vary, choose those with good reviews that prioritize privacy and security.
How often should I photograph my moles for monitoring?
Regular monitoring is advisable, especially if you notice changes. Consult with a dermatologist for personalized advice.
Can I use my smartphone camera for mole photography?
Yes, smartphones can be effective, especially with a macro lens attachment. Ensure the image is clear and detailed.
What should I do if my mole photo is rejected by an online platform?
Review the platform's guidelines and ensure your photo meets the requirements. Adjust lighting and focus if needed.